Editing presentation pages
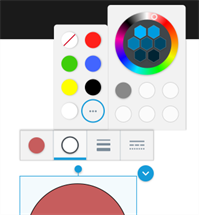
Customize presentation pages using the presentation page toolbar.

|
Tool |
Description |
|---|---|
|
Selection tool |
When you add an image, shape, line, text, or equation to the page it becomes a page object. Use the selection tool 
Click |
|
Pen, text, and eraser tools |
Use the Pen tool to draw on the page, the Text tool to insert and customize typed text, and the Eraser tool to remove digital ink on the page. |
|
Equation tool |
Use the equation tool |
|
Gallery |
Open the gallery |
 to select an object and reveal the controls for moving, rotating, and resizing it.
 to quickly add MathType and ChemType equations to the page.
 Add text either by copying it from another source and pasting it, or using the Text tool![]() .
.
To paste copied text on the page, select the page you want to add the text to and press Ctrl+V (on Windows) or Command+V (on Mac).
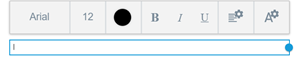
To add text using the Text tool.
-
Click
 and click where you’d like to insert text on the page.
A text box appears.
-
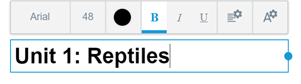
Type or paste the text into the box and use the toolbar above the text box to adjust text properties.
-
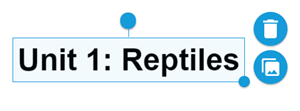
Click outside the text box when you’re done, and then click on the text again.
The text is now selected as an object that you can manipulate further by moving, rotating, resizing, or deleting it.
Tip
Double-click inside the text object to go back to editing the text.
-
Select the text object you want to edit.
A selection rectangle and object controls appear around the text object.
-
Double-click inside the text object.
The text properties toolbar appears and the text becomes editable.
-
Revise the text as necessary.
-
Click
 .
.The gallery opens.
-
Click
 to open the options for adding shapes and lines.
 -
Select either Shapes or Lines.
-
Click and drag the shape or line you want to use to the page.
OR
Double-click the shape or line you want to add it to the page.
-
Customize the appearance of the shape or line by using the object’s toolbar. You can change properties such as line style and width, color, fill, and more.
Easily add images from other sources using copy and paste, or use the media panel in Editing mode to search for images to add.
To paste a copied image on the page, select the page you want to add the image to and press Ctrl+V (on Windows) or Command+V (on Mac).
To add images using the media panel
-
Click
.The gallery opens.
-
Click
 to open the options for adding images.
 -
Upload an image from your device or search for one online:
Option
Steps
Upload an image from your device
-
Click Select Image.
If you’re working on a computer, your computer’s file explorer opens. If you’re using a mobile device, the camera roll opens.
-
Browse to and select the image.
The image appears as an object in the activity.
Search for an image online
-
In the Add online images text box, type what you’re searching for and tap Search
 .
.A list of images that match your search appears.
Note
Lumio uses Bing Safe Search and applies a filter that should return only images that are free to use under a Creative Commons licenses. Microsoft recommends that you verify the image’s licensing. Learn more.
-
Select an image and drag it into the activity.
The image appears as an object in the activity.
-
You can add web links to point to sources for your ideas.
To add web links
-
Click
.The gallery opens.
-
Click
 .
. -
In the Add a web link text box, type or paste a web link and then click Add link.
The link appears as an object in the page.
For most objects, such as images, text, and shapes, you can rotate and resize the object using the circular handles.
For lines you can adjust the line’s length or orientation by clicking and dragging one of the line’s end points.
For text, lines, and shapes, you can also change properties using the object’s toolbar that appears when you select the object.
Click![]() to reveal more options including locking the object in place, duplicating it, converting it to an Infinite Cloner The Infinite Cloner locks an object in place and transforms it so that students can select and drag to continue pulling out infinite copies of the object., or deleting it. See Editing presentation pages for more on how to manipulate objects.
to reveal more options including locking the object in place, duplicating it, converting it to an Infinite Cloner The Infinite Cloner locks an object in place and transforms it so that students can select and drag to continue pulling out infinite copies of the object., or deleting it. See Editing presentation pages for more on how to manipulate objects.
When you click a piece of text, image, or link in a lesson, a selection rectangle with object controls appears around it.
Click![]() to reveal more options:
to reveal more options:
|
Option |
Description |
|---|---|
|
Duplicate |
Create a copy of the object. |
|
Copy / Paste |
Copy an object page by selecting it and pressing Ctrl+C (on Windows) or Command+C (on Mac). To paste the object, select the page you want the copied object to appear on and press Ctrl+V (on Windows) or Command+V (on Mac). |
|
Delete |
Remove the object from the page. |
|
Infinite Cloner |
Locks an object in place and transform it so that students can select and drag to continue pulling out infinite copies of the object. 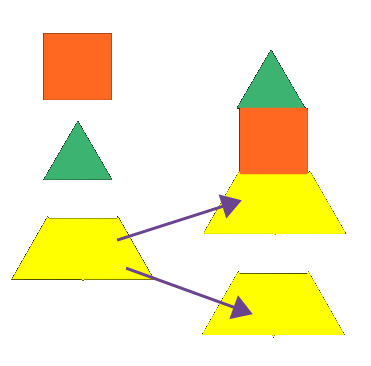
|
|
Lock |
Lock the object in place so that if you convert the page to an activity, students will be unable to move or manipulate it. That way, the object becomes part of the page background rather than something to interact with. 
Click |
|
Change order |
Use the Send to back or Bring to front options to send a selected object backward or forward on the page. 
|
To select multiple objects on a page and group them together, hold Shift or ctrl (Windows) or cmd (Mac) on your keyboard and click each object you want to group together. Then click one of the selected object’s More options![]() button and select Group. To ungroup, select the group of objects, click
button and select Group. To ungroup, select the group of objects, click![]() and select Ungroup.
and select Ungroup.